One light doesn't mean one look.
One of the most common habits I see among photographers learning studio lighting is finding one setup that works - and then using it for absolutely everything.
And I get it! Once you've found that perfect, flattering softbox position, it's tempting to leave it exactly where it is. Why mess with something that works, right?
But here's the thing: change the model, the studio space or even the equipment, and suddenly that perfect lighting setup might not work quite so perfectly anymore.
The good news? You don't necessarily need more lights to create more interesting portraits. Sometimes, simply changing the position, distance or modifier of a single light can completely transform your photograph.
Ideally, you want to understand how light behaves and why certain setups work, so you can make adjustments intentionally rather than relying on guesswork and endless trial and error. But we'll save the deeper lighting theory for another time!
Today, let's explore five creative one-light portrait photography setups that go a little beyond the usual Rembrandt lighting.
As a commercial fashion and beauty photographer, I often work with surprisingly simple lighting arrangements, especially when shooting beauty portraits and jewellery-on-model close-ups. And trust me, one light can do a lot more than you might think!
So, here are five creative one-light setups you can try during your next studio session, using nothing more than a bare-bulb flash or a standard reflector or a simple softbox. No fancy modifiers required!
1. Hard Light for an Editorial Look
Best for: Fashion photography, bold portraits and defined shadows.
Softboxes are wonderful, but soft light isn't always the answer!
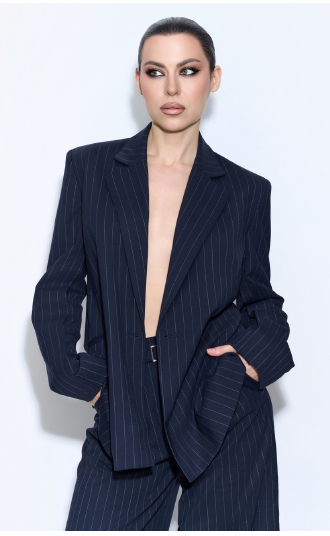
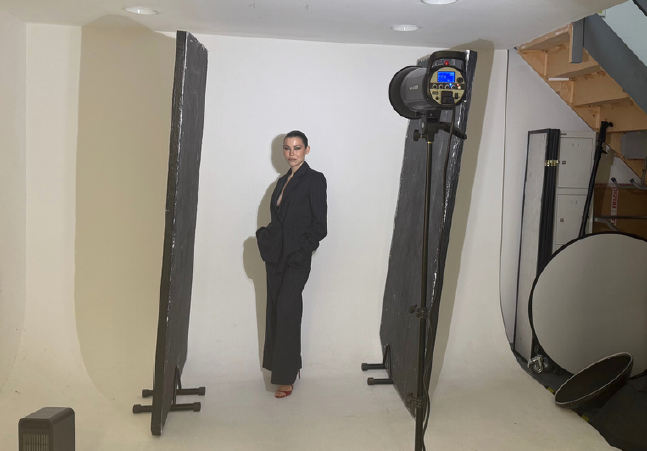
Try using a smaller light source, a standard reflector or even a bare-bulb flash to create harder, more defined shadows. Depending on the position of your light, you can achieve a bold, punchy look that works particularly well for fashion and editorial photography.
The key is to pay attention to where the shadows fall, especially around the nose, eyes and neck.
Personally, I like to position my light at approximately camera height, pointing directly towards the model's face. This creates a more direct, punchy lighting effect with relatively minimal shadows across the face, while still producing the crisp, defined shadows characteristic of hard light.
2. Soft Side Lighting
Best for: Fashion editorials, beauty photography and portraits.
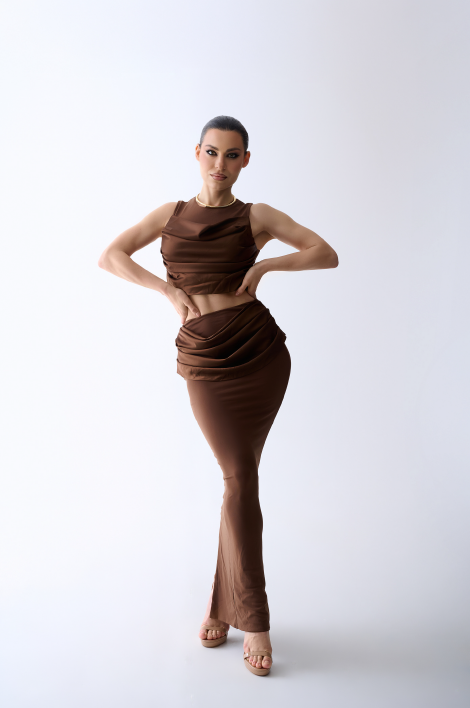
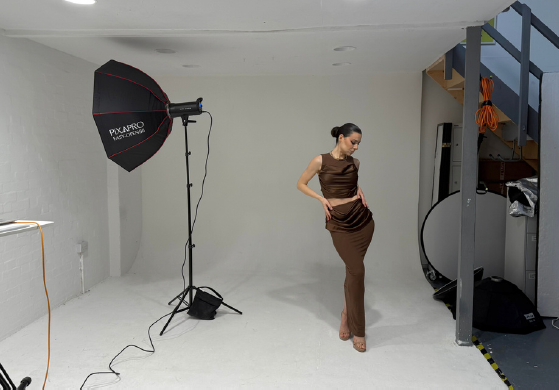
Want to add more depth and dimension to your portraits? Try bouncing your light off a white wall, foam board or even a piece of white fabric positioned to one side of your model.
Instead of pointing your light directly at the subject, you're using the reflected light to create a larger, softer light source. Positioning it to one side allows you to gently illuminate one side of the face while leaving the other in shadow, creating beautiful depth and definition.
If the shadows look a little too dramatic, simply add a white reflector or board on the opposite side of the model to bounce some light back into the darker areas and reduce the contrast.
You can experiment with a bare-bulb flash, a standard reflector or a softbox. The bounced light can be beautifully soft even without a modifier, provided the illuminated surface is sufficiently large relative to your subject. Using a softbox, as I did in the example below, can give you additional control over how the light spreads across the reflective surface.
My tip: Don't automatically fill in every shadow! Sometimes, a little contrast is exactly what gives a portrait its depth and character.
3. Soft Ceiling Light
Best for: Natural-looking headshots and soft, flattering portraits.
Want to create beautiful, diffused light without pointing your flash directly at the model? Try bouncing it off the ceiling!
Position your light in front of the model, with the softbox pointing upwards towards a white ceiling. The reflected light creates a large, soft source that can give your portraits a natural, daylight-like feel.
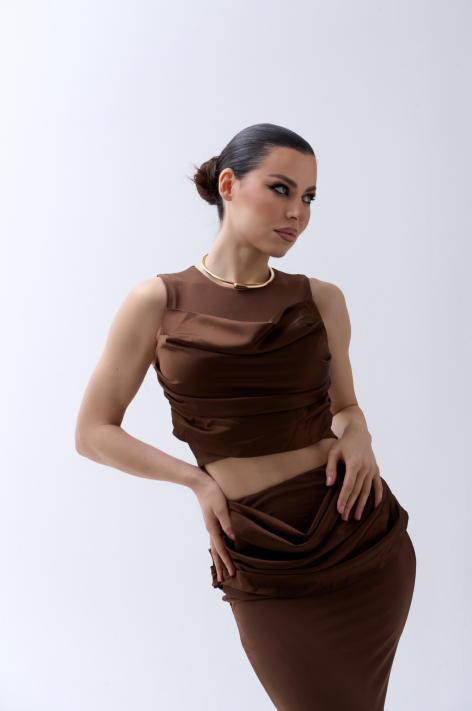
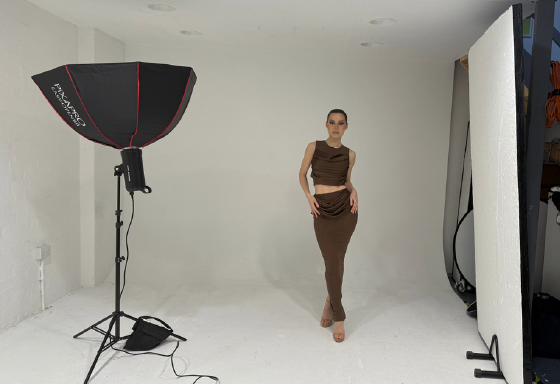
In my example below, I positioned the light slightly to the model's left, creating a little more dimension on the face. But you can also place it closer to the camera axis for more even, frontal illumination.
For this setup to work well, you'll ideally need a white, relatively low ceiling that can reflect plenty of light back onto your subject. Experiment with your flash power to achieve the right exposure, as bouncing light usually requires more power than direct lighting.
You can also try this setup without a softbox, using a bare-bulb flash or standard reflector. The softness will depend mainly on the size of the illuminated area of the ceiling, while your choice of modifier will affect how the light spreads across it.
My tip: Watch out for shadows under the eyes, nose and chin! Because the light comes from above, it can sometimes create unflattering shadows. Adjust where you aim the flash on the ceiling, or move the model slightly, to find a more flattering angle.
4. Backlighting for a Different Mood
Best for: Creative portraits, silhouettes and atmospheric fashion images.
Your light doesn't always need to be in front of your model!
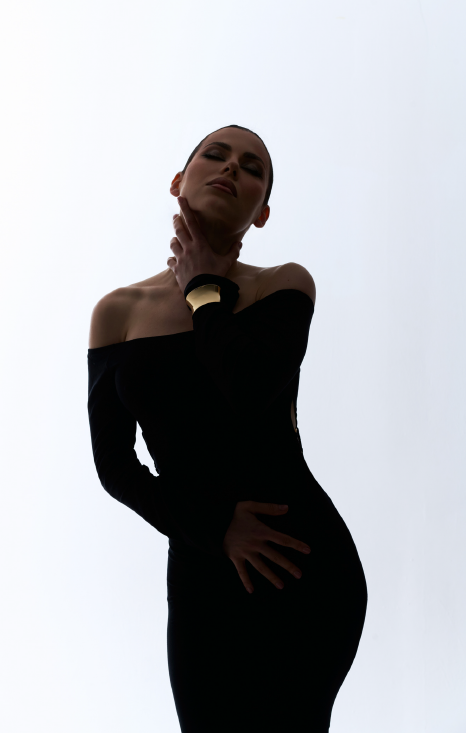
Try positioning a single light behind or slightly to the side of your subject. Depending on its direction, the background and how much light reaches the camera-facing side, you can create anything from a subtle rim light around the model to a dramatic silhouette.
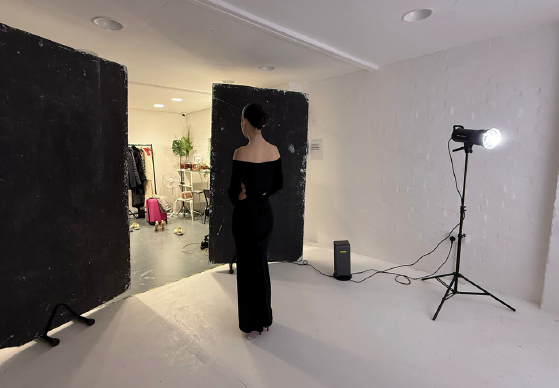
If you're shooting in a studio with white walls, you might find that too much light bounces around the space, illuminating the front of your model and making it difficult to achieve a strong silhouette.
Here's a simple trick: use black foam boards or pieces of black fabric to absorb unwanted reflected light. You can position them on either side of your model or in front of them, as shown in my behind-the-scenes images below. This technique, known as negative fill, helps keep the camera-facing side of your subject darker and creates a cleaner, more defined silhouette.
5. Soft Backlighting with a Reflector
Best for: Creative portraits, soft beauty lighting and atmospheric fashion images.
For this lighting setup, I'd recommend using a softbox to create a softer, more diffused backlight, although you can experiment with a bare-bulb flash too!
The idea is simple: position your light behind the model, pointing towards her. In my example below, I placed the softbox slightly to the model's left to create a beautiful, soft glow around her.
Now, here's the trick! Place a white reflector or foam board in front of the model, opposite the light source. This will bounce some of the light back onto her face, gently illuminating it while keeping that lovely backlit effect.
Without the reflector, the face might end up too dark, especially if you're shooting in a studio with minimal ambient light.
Don't have a white foam board? No problem! A standard 5-in-1 photography reflector, a piece of white fabric or even a large sheet of white paper can work.
My tip: Experiment with the reflector's distance from the model's face. Moving it closer generally increases the amount of reflected light reaching the face, while moving it further away reduces the fill and creates more contrast. Small adjustments can make a surprisingly big difference, so play around until you find the look you like!
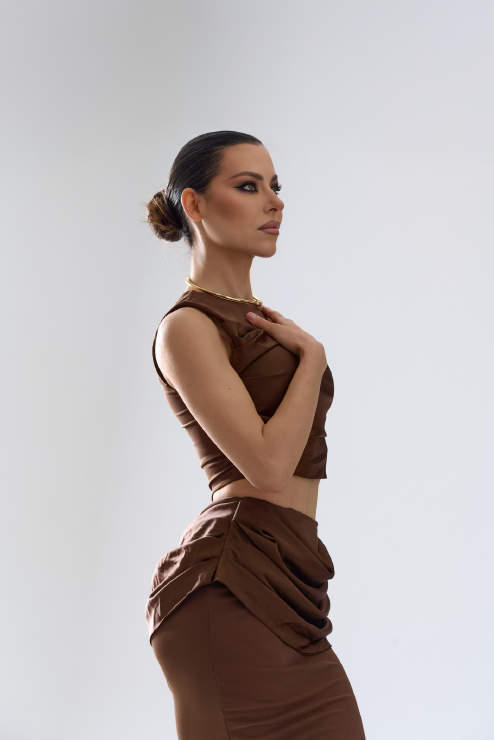
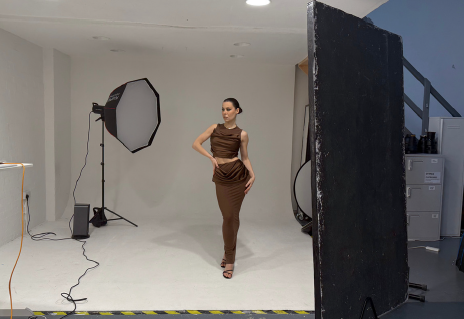
Which One-Light Setup Should You Try First?
There's no single best lighting setup for portrait photography. It all depends on the look you're trying to achieve.
For a clean beauty portrait, I might choose a large, soft light source close to the model's face. For a bolder editorial look, I might switch to a smaller modifier or move the light further to the side.
The real skill is learning to recognise the light you want and understanding how to create it with just one light source. Once you understand how light behaves, you'll find it much easier to adapt your setups to different models, locations and creative ideas.
And remember, you don't always need more equipment. Sometimes, you just need to get a little more creative with what you already have!
Want More One-Light Photography Ideas?
If you'd like to explore more creative possibilities, I've put together a detailed One-Light Photography Guide, featuring 16 lighting setups and 5 creative variations from my own photography work.
You've already seen a few of these setups in this article, but in the guide, I take things a step further, breaking down each setup in much more detail with additional lighting diagrams, behind-the-scenes images and practical tips to help you recreate the results yourself.
The 75-page PDF includes real photography examples, light positioning, modifiers, distances, and camera and flash settings - so you can spend less time guessing where to place your lights and more time actually creating.
Whether you're looking for fresh inspiration or want to feel more confident experimenting with studio lighting, this guide is designed to be a practical reference you can return to whenever you're planning your next shoot.